The new babies to removes make up from Local Brand is Shikada and Finesse both from MITU. You can read the review here SHIKADA REVIEW
The difference between them is tiny *not significant ingredients* and amount. Shikada has 30 sheets while Finesse only has 10 sheets, perfect for travelling, IMHO.
Now, the Western Brand review.
ALMAY Make Up Remover
They claim that they're the #1 Brand in America for removing make up.
Key Ingredients : Aloe Vera which is very good for moisturizing skin.
(I believe all my readers are tech savvy, so they can google the ingredients on their own)
Contains : 80 round sheets.
Price : Less than $10 - I bought it for Rp 80.000 early this year.
(Currency $1 = Rp 9.200)
Texture is oily, like no other make up remover that more wet. But i think that what's make it removes even waterproof mascara so easily.
It's a matter of preference, i though like it when my make up remover tissue or pad not so oily.
See the oily texture? It give stain to my finger every time i grab one pad.
Let's see it's power, shall we?
I use heavy eye make up, waterproof eyeliner and mascara and BB cream Skin 79 only on my face. Believe me, my mascara contains fiber that makes it harder to remove (will review it later, clue it's called Lash A _ _ _ _ _ _ _ 4D Mascara :p)
Result :
Tada............... :D
I looked like someone just punched me... LOL!
My two cents :
1. I prefer this Make up remover only for removing eye make up only, it is too small and too unconvenient if i used it to clean the whole face. The pad is a bit small for it, so the perfect usage is to remove eye make up.
2. I found it BEST to, use it only put it for about 30 seconds on my eyes and gently removes it. Not removing the eye area with circular motion whatsoever. Remember eye area is sensitive, we don't want the stain of the make up or eyeliner or mascara drop to our under eyes. It can cause dark circle in long term. Uh Oh...
3. I can perfectly use one pad to remove both eyes, and bye bye waterproof mascara and eyeliner.
After this, of course i also use Cleansing Milk to removes all the foundation and etc. Then i move on with my facial wash.
Now, share with me your favourite Make Up Remover, please ^^
Every review is based on my humble opinion, and after the products tested. Result can be vary in some people, i am not responsible for the outcome of the same products used in other people.
About Me
- White Lotus : Beauty on Budget
- Just an average master degree student, currently working on my thesis and doing make over in my spare time IF i'm not shopping LOL... I can be reach at imelda_husin@yahoo.co.id if you guys want me to review your products or sponsorship or simply wanna chat. Thank you...
Showing posts with label how to. Show all posts
Wednesday, October 24, 2012
Friday, March 2, 2012
Contouring Part 2 (ROUNDED Face) For Dummies, Like Me
Part one is about nose, click me
Time for requested post, lots of people been asking this question, including me! How to make us look slimmer without exercise? Well, that's impossible, simply impossible, but we can always CHEAT haha..
If your face is round like i used to be while i were xx kgs you'll start thinking every way possible to make you or at least your face look thinner/slimmer.
The answer is contouring face, it only takes few minutes and you can have those high cheek bone which makes your face look longer and thinner.
I AM NOT AN EXPERT, i learned from mistakes and LOTS of mistakes, and honestly i still DID some mistakes till now :D but i can share from my experience, i hope this is helpful for those fantabulous who requested.
How to contouring (ROUNDED) face.
I used to have rounded face, but now since i was slimmer a bit, my face change to a heart shape. So this may not be 100% accurate, i just wanna share the "how to".
Let's just get started, before you get bored and browse something else ^^
First, what you're gonna need is the products, concealer or foundation stick will do or 2-3 shade of foundation (Er.. getting confused? Relax.. i'll explained it all). I used my unbranded concealer palette, because i'm simply lazy to open my train case, and it contains lots of color corrector so it's a time saver.
Concealer : the plus to contour with concealer palette is time saver, also you can correcting (dark spot, etc) at the same time.
Foundation stick : beside it is also a time saver it's more easy to use, you don't need anything to put that on your face, but make sure you clean it after using, you know health reason.
Foundation : Needed more than one shade, first the lighter shade to highlight your face, and the darker shade to contour (the area that needed to be contoured is the same, but the application is a bit tricky, you have to apply it several times to get the perfect look). Simply says that you need practice to expert this.
Second, you're gonna need, make up sponge or brushes or simply finger, whatever you prefer. And whatever you decide to use, make sure it is hygienic.
Third, your face? To be contoured haha.... (trying to make a joke here >.<)
How to
After moisturizer or primer, then :
1. Take the concealer or foundation stick an apply it to Temple of your face, Under your Cheek Bone, And Jaw Line, and Nose.
2. Use your tools (sponge, brushes, finger) to blend.
I personally like to contour my face before foundation or powder unless i have to perform on stage, WHY? Because if i do it after foundation, it tend to be so harsh and not looking natural.
You can use foundation first, and contour later of course, and make it looks smoother with powder.
See the arrow, is the area that need the contouring. Just choose the shade 1-2 tone darker than your actual skin.
DON'T FORGET the under eye area and the inner corner area, why? Because it help to open the eyes, and make your face freshen.
Result
With Flash
No Flash
Product used :
Face :
Unbranded concealer palette
Cover Girl Foundation ( Buff beige and Classic Tan)
Cheek :
Cameleon blush palette
Eyes :
Aubeau eyeshadow base
Sephora Color Play 5 in 1
Evany Senses Mascara - Black
Lip :
Just Miss lipstick J-13
Time for requested post, lots of people been asking this question, including me! How to make us look slimmer without exercise? Well, that's impossible, simply impossible, but we can always CHEAT haha..
If your face is round like i used to be while i were xx kgs you'll start thinking every way possible to make you or at least your face look thinner/slimmer.
The answer is contouring face, it only takes few minutes and you can have those high cheek bone which makes your face look longer and thinner.
I AM NOT AN EXPERT, i learned from mistakes and LOTS of mistakes, and honestly i still DID some mistakes till now :D but i can share from my experience, i hope this is helpful for those fantabulous who requested.
How to contouring (ROUNDED) face.
I used to have rounded face, but now since i was slimmer a bit, my face change to a heart shape. So this may not be 100% accurate, i just wanna share the "how to".
Let's just get started, before you get bored and browse something else ^^
First, what you're gonna need is the products, concealer or foundation stick will do or 2-3 shade of foundation (Er.. getting confused? Relax.. i'll explained it all). I used my unbranded concealer palette, because i'm simply lazy to open my train case, and it contains lots of color corrector so it's a time saver.
Concealer : the plus to contour with concealer palette is time saver, also you can correcting (dark spot, etc) at the same time.
Foundation stick : beside it is also a time saver it's more easy to use, you don't need anything to put that on your face, but make sure you clean it after using, you know health reason.
Foundation : Needed more than one shade, first the lighter shade to highlight your face, and the darker shade to contour (the area that needed to be contoured is the same, but the application is a bit tricky, you have to apply it several times to get the perfect look). Simply says that you need practice to expert this.
Second, you're gonna need, make up sponge or brushes or simply finger, whatever you prefer. And whatever you decide to use, make sure it is hygienic.
Third, your face? To be contoured haha.... (trying to make a joke here >.<)
How to
After moisturizer or primer, then :
1. Take the concealer or foundation stick an apply it to Temple of your face, Under your Cheek Bone, And Jaw Line, and Nose.
2. Use your tools (sponge, brushes, finger) to blend.
Temple of your face : Blend it to your hair line
Under your cheek bone : Blend it upwards
Jaw Line : Blend it down to neck area
I personally like to contour my face before foundation or powder unless i have to perform on stage, WHY? Because if i do it after foundation, it tend to be so harsh and not looking natural.
You can use foundation first, and contour later of course, and make it looks smoother with powder.
See the arrow, is the area that need the contouring. Just choose the shade 1-2 tone darker than your actual skin.
DON'T FORGET the under eye area and the inner corner area, why? Because it help to open the eyes, and make your face freshen.
Result
With Flash
No Flash
Product used :
Face :
Unbranded concealer palette
Cover Girl Foundation ( Buff beige and Classic Tan)
Cheek :
Cameleon blush palette
Eyes :
Aubeau eyeshadow base
Sephora Color Play 5 in 1
Evany Senses Mascara - Black
Lip :
Just Miss lipstick J-13
Friday, January 6, 2012
10-15 Minutes To Go Look
I'm a lazy person when it comes to make up. I'm too lazy to apply so many products to my face. I would like to just put moisturizer, TWC, blush on, mascara, eyeliner, eyebrow pencil, and lipgloss only. And when i got into one product it's so difficult for me to switch, therefore i used the same product over and over again. So i wouldn't bother to do 2011 favourite (unless anyone requested), but you guys already know, it's all mostly comes from Indonesian Brand.
And since i got a lot of "sudden" request of hang out, meeting, whatsoever, sometimes i got to do my face and get ready in short time. So i thought why not made a post about a quick make up. It's perfect to do when you are in a rush, or just late being somewhere, or early in the morning when you have to catch a bus to work.
I got inspired a lot by FOTD forum on FD, and looxperiment they both raving about white eyeliner. Uh huh.. since i didn't touch my beloved Inez white eyeliner pencil, why not??? Thanks is in order to both of them, they're amazing!!!!
Let's get started shall we?
I got a lot of product prepared, but ended up just using some of them, haha lazy me... (Ended up for less than 10 products i believe, brush not included)
Eyes Section (approx. 3-5 mins)
1 : NYX Jumbo Pencil in White as base, so my eyeliner gonna stand for hours. Decided not to use any eyeshadow on this look.
2 : Using Sari Ayu Duo Eyeliner and Mascara, line both my upper and lower lash. I like to use liquid eyeliner if i don't wanna touch up, because with the base and the texture, liquid tend to last longer than pencil eyeliner.
3 : To brighten my eyes and make more drama to my eyes, i apply my beloved Inez White Eyeliner Pencil.
4 : Curl my lashes with ELF eyelash curler
5 : Applied mascara, it's best to applied mascara after curl your lashes. Because if you curl it after mascara, the mascara stain will left in your curler's head and tend to break you lashes, makes it fall down.
6 : With RedA translucent powder highlight my nose bridge, cupid bow, and brow bone. If you want to save time, it's better to highlight your face than to contour it.
Cheek and Lip section (approx 3-5 mins)
Using the same palette, the old packaging of Wardah Lip Palette, using the first left row - pink color for my lips, applied with LYRA 03 painting brush. I like this brush so much, it's made from synthetic and easy to clean also perfect to line and fill the lips. Also with it's price approx. $1 what's not to love?
On to cheek, applied the mark color with unbranded brush, and blend! My face looks ridiculous before blending LOL.
My lips got a bit chappy, so i added lipgloss afterward.
And since i got a lot of "sudden" request of hang out, meeting, whatsoever, sometimes i got to do my face and get ready in short time. So i thought why not made a post about a quick make up. It's perfect to do when you are in a rush, or just late being somewhere, or early in the morning when you have to catch a bus to work.
I got inspired a lot by FOTD forum on FD, and looxperiment they both raving about white eyeliner. Uh huh.. since i didn't touch my beloved Inez white eyeliner pencil, why not??? Thanks is in order to both of them, they're amazing!!!!
Let's get started shall we?
I got a lot of product prepared, but ended up just using some of them, haha lazy me... (Ended up for less than 10 products i believe, brush not included)
Face Section (approx 5 mins)
1 : LT PRO Cream Foundation - Yellow Orange, applied with finger and blend it with finger also.
2 : Covering the stress and tired look with Everyday Mineral - Purple, applied with index finger and blend it gently.
3 : Setting the foundation with Marck L/P in Creme, applied with ecotools brushes.
1 : NYX Jumbo Pencil in White as base, so my eyeliner gonna stand for hours. Decided not to use any eyeshadow on this look.
2 : Using Sari Ayu Duo Eyeliner and Mascara, line both my upper and lower lash. I like to use liquid eyeliner if i don't wanna touch up, because with the base and the texture, liquid tend to last longer than pencil eyeliner.
3 : To brighten my eyes and make more drama to my eyes, i apply my beloved Inez White Eyeliner Pencil.
4 : Curl my lashes with ELF eyelash curler
5 : Applied mascara, it's best to applied mascara after curl your lashes. Because if you curl it after mascara, the mascara stain will left in your curler's head and tend to break you lashes, makes it fall down.
6 : With RedA translucent powder highlight my nose bridge, cupid bow, and brow bone. If you want to save time, it's better to highlight your face than to contour it.
Cheek and Lip section (approx 3-5 mins)
Using the same palette, the old packaging of Wardah Lip Palette, using the first left row - pink color for my lips, applied with LYRA 03 painting brush. I like this brush so much, it's made from synthetic and easy to clean also perfect to line and fill the lips. Also with it's price approx. $1 what's not to love?
On to cheek, applied the mark color with unbranded brush, and blend! My face looks ridiculous before blending LOL.
My lips got a bit chappy, so i added lipgloss afterward.
I got my digicam back, my friend fix it for me. Thanks bro!!! And praying for JNE to quickly deliver the package from Make Up Tool, so i can throw my giveaway soon.
Let me know what you think ladies, do you find this post helpful? Thank you for sticking with me, have a great day my fantabulous!!!
Wednesday, June 15, 2011
Daily Natural Look
I've been neglecting my skin care ritual lately, and it did show the un-wanted result. My face is full of white heads and pimples, so i didn't wear too much product on my face. And i did like how i look like, not pale but simple natural make up.
With Maybelline bb cream, Marcks loose powder in creme, and Nyx natural cream blush on, mascara and eyeliner and lipgloss. I'm set.
outdoor no flash
indoor no flash
outdoor no flash - just me, posing :D
I've found a new way to wear my cream blush on, and this is my favourite way to wear it since. I know probably all of you know it already but it's not a sin sharing it with you again rite :pFirst : I dipped my brush to my cream blush, and with tap it to my cheek while i'm smiling so i got the perfect apple of the cheek.
Second : I blend it carefully both sides
Third : Then, i applied my powder (in this case i always use loose powder, but did tried with TWC and the result is doing just fine also, gives a hint of glowy cheek)
My cheek, hope the picture is clear enough for you guys to see. I'll catch you guys later. Bubye....
Monday, May 23, 2011
Short Review on Biore 2 in 1 Cleansing Wash and The Other Function Of It
This is a new range of cleanser of this brand that currently invaded in local drugstore and groceries, for you ladies that lives abroad probably you are won't find this stuff interesting. But here in Indonesia, we got very severe skincare and make up brands, so this is a very exciting thing to post. Sadly i forgot how much i get this product, because it bought it with other stuff also. But it was probably around IDR 25-35 k.
Already lots of reviews that claim this is a good product to rinse off your make up and clean your face in one step, i'm not gonna review this product for it real function this time. And i found it more interesting if i did a full review of it as "my new routine of cleansing my brushes". My usual routine on cleansing brushes, you can read it here
How did i end up with that idea, is when i was so in a rush and my foundation brush was dirty and i couldn't find my HG brush cleanser from Make Up Tool, and my eyes caught this product sitting nicely on my vanity drawer, i grab it and rinse my foundation brush with this. Well... well.. it gives a nice result, so i decided to share it with you ladies. I really hope you will find this tips helpful.
My current favourite brushes is on the way to getting a bath
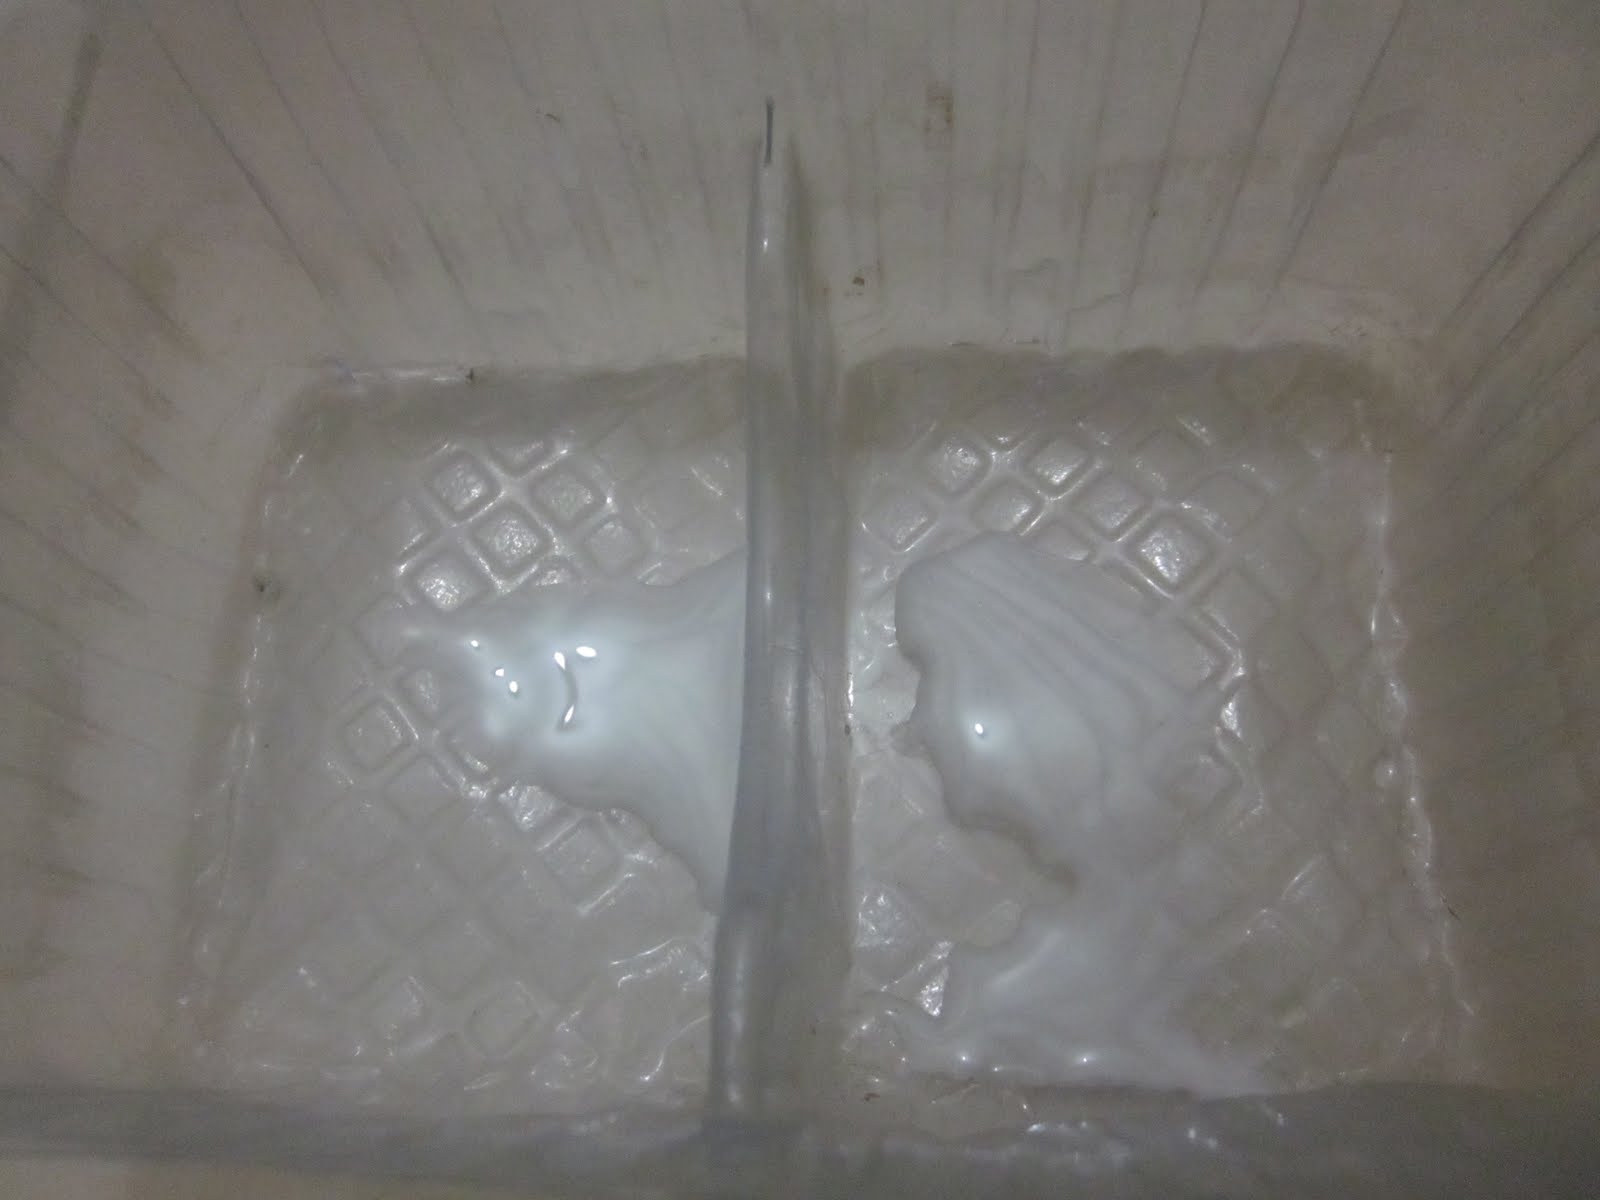
Put about one tea spoon of this Biore 2 in 1 Cleansing Wash on each side of the transparent box -which was originally my snack :D-
Cleanse my brush on one side and rinse it with the other side of water, this is why i love this transparent box, i can clean and rinse my brushes on 2 in 1 way also.
I did this step repeatedly with all of the brushes, the separated water make sure i clean it and rinse off the excess of the dirt that may still there.
Can see the difference? Before and after and the second rinsing.
After cleansing and rinse all of the brushes, i refill the transparent box with distilled water again and do the final rinse. If there's no stain left then the brushes is good and ready for drying.
I really love this new way of cleaning my brushes, because it removes the dirt and the oil, some foundation give excess more sometimes it comes sort of oily. I might continue doing this, and will do other review on this cleanser as a face cleanser, wait it up dear ladies.
And thank you for keep reading. Love you a lot ^^
Already lots of reviews that claim this is a good product to rinse off your make up and clean your face in one step, i'm not gonna review this product for it real function this time. And i found it more interesting if i did a full review of it as "my new routine of cleansing my brushes". My usual routine on cleansing brushes, you can read it here
How did i end up with that idea, is when i was so in a rush and my foundation brush was dirty and i couldn't find my HG brush cleanser from Make Up Tool, and my eyes caught this product sitting nicely on my vanity drawer, i grab it and rinse my foundation brush with this. Well... well.. it gives a nice result, so i decided to share it with you ladies. I really hope you will find this tips helpful.
My current favourite brushes is on the way to getting a bath
Put about one tea spoon of this Biore 2 in 1 Cleansing Wash on each side of the transparent box -which was originally my snack :D-
Cleanse my brush on one side and rinse it with the other side of water, this is why i love this transparent box, i can clean and rinse my brushes on 2 in 1 way also.
| sorry for the pic :D |
After cleansing and rinse all of the brushes, i refill the transparent box with distilled water again and do the final rinse. If there's no stain left then the brushes is good and ready for drying.
I really love this new way of cleaning my brushes, because it removes the dirt and the oil, some foundation give excess more sometimes it comes sort of oily. I might continue doing this, and will do other review on this cleanser as a face cleanser, wait it up dear ladies.
And thank you for keep reading. Love you a lot ^^
Monday, March 21, 2011
Sometimes Fake Add More Drama - How I Wear Falsies
Well, since i got a big package of falsies from Make Up Tool and i forgot to take a proper pic from yesterday event so i decided to re-do the look. Well, not really exact the same, pretty much simpler than the other night but for the eyes, somehow i prefer today's look. You can see what type and how the falsies look like on this link
This is an answer for some of my friends that asking me about how to wear falsies. Actually, there's several ways to wear them, but this post is gonna be about my favourite way to wear falsies. And believe me ladies, i pretty much tried all of the tips. This is the easiest way for me, and i hope it'll work out just fine with you.
What you're gonna need : falsies *dooh :D*, eyelash glue, scissor, eyelash curler, eye liner (pen, gel, liquid -whatever you prefer)
Let's start :
Draw a black/ chocolate liner on your lash line, this step is making you easier to measure the falsies and know where to put them. Then curl your lashes, we don't want the falsies separated from the original lashes, it's gonna look awkward, yes?
Put some eyelash glue on the line -that we already draw-, this is gonna make your falsies stick longer because it's twice sticking power than when you put only glue on your falsies. Plus, while we put the glue on the falsies, it can dry up a bit so it'll be easier to put the falsies on.
Put some glue on the falsies -see picture below- and add extra to the outer/inner corner, because usually it get's off easily in the outer area.
Use a tweezer or your finger -whatever you prefer- to put the falsies on your lash line. I prefer stick them on the middle first, then i can easily stick the outer and inner corner area.
Make sure it put perfectly on the lash line, and this is the technique i usually use, add some glue -just thin- to put together your falsies and your original falsies. Don't over-do it because it will be hard to take the falsies off after.
That pretty much it, if you have any question please don't hesitate to ask, or simply drop a comment. Thank you ladies, remember practice makes perfect ^^
Now on to review, i already linked the look and where'd i get the falsies up on this post. And i think, even tho the falsies look so thin and the lashes is not too crowded, but it did the job well on my eyes. Because i already have thick and long lashes so this one adding up drama on my eyes without making it too much. For party wear and daily wear this is amazing.
But for some, maybe this falsies a bit too ordinary, because some people have thinner and shorter lashes. But i got the trick, double it up, and voila.. you are ready sista :)
What i love about this falsies :
* The band made of thread, which is easier to bend
* Can be worn more than once since the bend is easy to clean up the stain of the glue
* Easy to pull from the box, if i buy individual lashes, it kinda hard to pull from it's packaging and sometimes it RUINED the shape of the falsies. But not with this one :)
* Didn't take much space to store, individual lashes take many space on my traincase.
What i not too fancy about this falsies :
I love the texture and everything, it's just i prefer my falsies have a very long look on the outer corner but this one is not really. it comes on a round shape, and if i want it to look longer on the outer corner i have to do the cutting very carefully. Other than that, i love this falsies.
I probabbly will get myself another shape of this brand, hm... later maybe, after my traincase and my brushes arrived *wink*
EOTD and FOTD using this falsies
Face :
Maybelline bb cream
Fanbo TWC in Sawo Matang (this is probably a comparison shade between NC35-NC40)
Cheek :
ELF all over color stick in pink lemonade just tap it
Lips :
Wardah exclusice palette shade 33
Eyes :
ELF all over cover stick in apricot beige as base
CS 88 palette - in bright yellow for lid and taupe for crease
PIXY liquid eye liner in black
Evanysenses waterproof mascara - uses in both upper and lower lash line
NYX eye brow pencil in brown
Tools :
Pink Powder brush in circular motion to apply TWC - also included on the link up above how this brush look like-
Big angeled brush to blend the cheek - unbranded
This is an answer for some of my friends that asking me about how to wear falsies. Actually, there's several ways to wear them, but this post is gonna be about my favourite way to wear falsies. And believe me ladies, i pretty much tried all of the tips. This is the easiest way for me, and i hope it'll work out just fine with you.
What you're gonna need : falsies *dooh :D*, eyelash glue, scissor, eyelash curler, eye liner (pen, gel, liquid -whatever you prefer)
Let's start :
Draw a black/ chocolate liner on your lash line, this step is making you easier to measure the falsies and know where to put them. Then curl your lashes, we don't want the falsies separated from the original lashes, it's gonna look awkward, yes?
Put some eyelash glue on the line -that we already draw-, this is gonna make your falsies stick longer because it's twice sticking power than when you put only glue on your falsies. Plus, while we put the glue on the falsies, it can dry up a bit so it'll be easier to put the falsies on.
Put some glue on the falsies -see picture below- and add extra to the outer/inner corner, because usually it get's off easily in the outer area.
| PS : don't forget to cut your falsies to match she length of your eyes |
Use a tweezer or your finger -whatever you prefer- to put the falsies on your lash line. I prefer stick them on the middle first, then i can easily stick the outer and inner corner area.
Make sure it put perfectly on the lash line, and this is the technique i usually use, add some glue -just thin- to put together your falsies and your original falsies. Don't over-do it because it will be hard to take the falsies off after.
| left -with falsies : right - no falsies |
That pretty much it, if you have any question please don't hesitate to ask, or simply drop a comment. Thank you ladies, remember practice makes perfect ^^
Now on to review, i already linked the look and where'd i get the falsies up on this post. And i think, even tho the falsies look so thin and the lashes is not too crowded, but it did the job well on my eyes. Because i already have thick and long lashes so this one adding up drama on my eyes without making it too much. For party wear and daily wear this is amazing.
But for some, maybe this falsies a bit too ordinary, because some people have thinner and shorter lashes. But i got the trick, double it up, and voila.. you are ready sista :)
What i love about this falsies :
* The band made of thread, which is easier to bend
* Can be worn more than once since the bend is easy to clean up the stain of the glue
* Easy to pull from the box, if i buy individual lashes, it kinda hard to pull from it's packaging and sometimes it RUINED the shape of the falsies. But not with this one :)
* Didn't take much space to store, individual lashes take many space on my traincase.
What i not too fancy about this falsies :
I love the texture and everything, it's just i prefer my falsies have a very long look on the outer corner but this one is not really. it comes on a round shape, and if i want it to look longer on the outer corner i have to do the cutting very carefully. Other than that, i love this falsies.
I probabbly will get myself another shape of this brand, hm... later maybe, after my traincase and my brushes arrived *wink*
EOTD and FOTD using this falsies
Face :
Maybelline bb cream
Fanbo TWC in Sawo Matang (this is probably a comparison shade between NC35-NC40)
Cheek :
ELF all over color stick in pink lemonade just tap it
Lips :
Wardah exclusice palette shade 33
Eyes :
ELF all over cover stick in apricot beige as base
CS 88 palette - in bright yellow for lid and taupe for crease
PIXY liquid eye liner in black
Evanysenses waterproof mascara - uses in both upper and lower lash line
NYX eye brow pencil in brown
Tools :
Pink Powder brush in circular motion to apply TWC - also included on the link up above how this brush look like-
Big angeled brush to blend the cheek - unbranded
Wednesday, March 16, 2011
Watermelon, everyone? (LIPSTICK ART)
I saw one of my friend's blog.. and goes.... CRAZY, i think this is superb...
We see a lot of creativity on eye make up, but lipstick to be honest this is my first time seeing such a cute shape. She posted a lot of pictures of lipstick art, see the cute pictures on her blog here i think she took the pics from Google.
Wanna try one of those, but since i'm not a very creative person, i'm gonna try out with the easiest one first, :D
Tutorial also posted, so feel free to let me know what you think ladies... Thank you ^^
Let's get into how to do this....
1. Put something to soothe your lips, and will work as base also (lipbalm, or vaseline petroleum jelly)
2. Tap some powder to cover up the lips, also to make the color last on your lips.
3. Put a base color on your lips, i used eyeshadow to create almost the exact color compare to the exact color of watermelon
4. Blend the base color, don't worry about the excess. You can clean up later. Draw a line to differ both color application (I used white eye liner pencil). After that, start to the other color, still using the same eye shadow palette
5. Use a black gel liner or pencil liner, dot some on the middle of the lips. You can use cotton bud or eye liner brush, whatever you prefer
HERE'S THE RESULT...It seems easy, but it can be tricky. I got a problem with the green color, so after draw a green line, i have to re-apply the pink shade. Took me about 15 mins to do this... Well, for the first trial i think it's ok.
Subscribe to:
Posts (Atom)